Pages

Tuesday, December 28, 2010

My Top Ten Projects From 2010


I'm not sure where this got started, but several of my blog friends have compiled a 2010 Top Ten Favorites list, so this afternoon I took some time to look back at all the projects I created during my first year of cardmaking.  I will be celebrating my one year "Blogaversary" on January 4th and will soon be trying to improve on both the look of my blog and also on the photography of my cards.   I hope you will take a look at some of my favorites from 2010.

Here are my Top Ten Projects for 2010.
                                                                       Baby Dear


Happy New Year to all  my crafty friends!  I have gotten so much pleasure from this new hobby and have not only learned, but been inspired by the creativity you, my fellow cardmakers.   This has been one of the happiest years of my life and I have truly enjoyed creating and sharing my cards with you.


Thursday, December 23, 2010

I'm Done!

I just wanted to share my last Christmas gift wrap with you today. I am finally done! I wrapped up some homemade jam I got in Montana last October, Huckleberry (looks like blueberry, but tastes a little like raspberry). Doesn't a simple jar of jam look so pretty in a clear red striped bag with just a bow and a cute little Friendship Jar tag? I was so happy just looking at these little bags and their matching tags. Hope everyone is just about done with their Holiday preparations and I would like to wish everyone a very Merry Christmas!

Monday, December 20, 2010

First Gift Bag

Today I made my very first altered gift bag. I wanted to make something for our family gift exchange and used a simple kraft bag. I bought a MS pine needle punch for $4.99 at Michaels yesterday and used it on some Pinefeather cardstock. It punched very nicely, even though in the past I have had problems with MS punches and PTI cardstock. I used it as a little border around the bag. I made a small border from some polka dot paper I had and cut some reindeer using my cricut. I punched a few snowflakes, used some tinsel glitter and a red rhinestone for the reindeer noses. Of course I had to make a matching tag to go with it and just scaled down all of the same elements I used on the bag. I love how this turned out and plan on making several more before Christmas Eve.

Saturday, December 18, 2010

Enjoy the Ride Thank You

I used my wonderful stamp set I got in the Christmas Swap from Keva last week. I had wanted to own Enjoy the Ride for a long time, but never got around to buying it as there is always so many new sets I want from the new releases every month, but I love this set. I made a little thank you card for Keva to show her how much I appreciated her thoughtful gift. Since she should have the card by now, I decided to post it. I used some Green Boutique patterned paper for the car and stamped the little word "friend" onto the license plate. The card is layered on Mat Stack #3 which is embossed with the linen impression plate onto Hawaiian Shore cardstock. The card layer is Aqua Mist stamped with a Damask Design background in Fresh Snow Ink. I used a doily and some twine that matches Hawaiian Shore paper perfectly. A couple of little white buttons serve as the headlights. I am loving these 4 1/4 x 4 1/4 cards lately. This was a very fun card to make.

Friday, December 17, 2010

There's No Place Like Home for the Holidays Tag

Made a quick tag today for my husband's gift. It all started with that teeny little left over snip of felt. I thought it would look cute as the snow on a rooftop. I used a left-over square from the Take Three die, punched a little heart in it to mimic the new PTI Love Lives Here house and cut a triangle for the roof. I used A Little Argyle to stamp the roof design, colored some of the rooftop diamonds with copics and glittered a few up. The fences are from Home for the Holidays, Boards and Beams as well as the bow and sentiment. I used a music background stamp on Tag Sale #2. The last little piece was the Pinefeather ribbon and Pure Poppy Button. I think it turned out really cute and should tide me over until I can buy the adorable Love Lives Here stamp set.

Thursday, December 16, 2010

Warm Winter Wishes

This is one of my Christmas cards I can only dream of here in Southern California. I don't even own a pair of mittens and everyone would laugh if I wished them "Warm Winter Wishes", but I gave my copics some use and colored up some patterned paper using a cute mitten stamp I got from Michael's. I used a small sentiment from Friendship Jar Holiday Fillers in red and blue along with Fillable Frame #9 as the sentiment focal point. I used Martha Stewart's Snowflake Trim double-edge punch for the snowflake trim. It was dipped in Tinsel glitter and really is sparkly in person. An extra snowflake and some popped-up mittens finish off this card. To all my PTI friends who actually see some snow, "Warm Winter Wishes!"

Wednesday, December 15, 2010

I thought I was done with Christmas Card

My daughter was watching me address all my Christmas cards yesterday and made the comment, "Are you giving us a Christmas card, Mom?" (referring to her and her two brothers who no longer live at home). I was ashamed to admit that I had just addressed her brothers cards, but had not made Carly one since she still lives at home. What a bad mom I am. I made her lots of tags to go on her gifts, but no actual card. I asked her if she wanted a card and she jokingly said yes, and she wants one that is "heartfelt", not funny. Oh how I wish I had the new Love Lives Here set from PTI. It would have been absolutely perfect for a "heartfelt" card. Since I don't have it, I made due with really putting a lot of home-made effort into her card. I stamped a music background onto Pinefeather paper with Vintage Cream ink. I used Vintage Cream felt to die-cut a Christmas Tree and stitched on it with green thread. I added some buttons for ornaments with glue dots. I cut a little border and actually used some of my beautiful PTI saddle-stitch Pinefeather ribbon. I cut a little tag and stamped the sentiment on it. Carly won't realize how many different elements it has on it, but it was definitely heartfelt. The inside is where I will totally make her cry. I wrote a little letter to her talking about all the wonderful Christmas memories I have of just her and I together. She probably has forgotten lots of them and I hope the letter will bring back some happy memories for her. I know they did for me. I am tearing up just thinking of it. Heartfelt.

Sunday, December 12, 2010

Mat Stack 2 & Doily Christmas Card

Today I made my last Christmas card. I used Mat Stack 2 again and made my own little background for it. I used the dotted circle from Take Note, little embellishments from Vintage Labels 4 on the edges and a few red rhinestones to bling it out a bit. I punched a 1 1/2" scalloped circle and stamped it with a music background. The sentiment is from 2010 Holiday Tags and a little red/white twine wraps around the doily. The picture isn't clear, but the Pure Poppy cardstock is embossed with the Linen Impression plate. I have found that 4 1/4" square cards go really well with 4" doilies. Thanks for taking a look at my final Christmas card of 2010.

Saturday, December 11, 2010

Mat Stack #2 Tag

This little tag is going to help me make it through the December PTI release. This will be the first month I have not placed a PTI order on release night. I love everything they are going to release, but am going to force myself to "think" a little longer before I frantically order so much at midnight on the 15th. This little tag using Mat Stack #2 was made to try to create something in place of the new Mat Stack #2 and music background stamp sets being released this month. I decided to use what I already own and stamped a music background circle in Pure Poppy. This is a very large rubber stamp by Stampendous called Music Score. I used a nestability mat cut in Pure Poppy behind the circle and adhered it to the Mat Stack #2 die cut. Next, I die cut a snowflake and stamped it with a snowflake from Snowflake Serenede. This stamp actually fits the snowflake die from Peace Be Still very nicely. I sprayed it with some adhesive spray and dunked it in Prisma Glitter. It was added to the music circle with some dimensional tape. A few extra snowflake stamps I had from past years (Michaels) were added to the ends of the Mat Stack. I tied it onto some ribbon with red/white bakers twine. I am certain the Mat Stack #2 stamp set is going to be wonderful, so let's see how long I can refrain from ordering. I am already starting to go into withdrawals.

Thursday, December 2, 2010

Sleigh Ride

I made a tag the other day that brought out the obsessive-compulsive in me. I must have gone into my craftroom to look at it every time I walked past the door. It was just so soft and sparkly with all the glitter. I decided to make a card based on that tag. I used Blueberry Sky paper and inked up the Sunshine embossing plate with Fresh Snow Ink. I don't have a brayer, but I just patted the ink pad all over the plate and ran it through my cuttlebug. I love the look it gave! It was my first time giving that technique a try. I had to turn the fillable frame image on its side, which I don't think is as pretty as the tag, but it was necessary for it to work on this card. I used some silver wired ribbon to break up the card a bit and that was all. I still like the tag better, but was glad I tried out a new technique. Thanks for taking a look.

Tuesday, November 30, 2010

Sketch Challenge #306

This card was made using SplitcoastStampers Sketch Challenge #306. Lately I have found that I have a much easier time coming up with card ideas when using a basic sketch. When I saw the circle image I immediately thought of a snow globe and although I didn't have a snow globe stamp, the snowman from Friendship Jar Holiday Fillers does remind me of an image you might find in a snow globe. I used some wide ribbon I had left over from last Christmas and some Martha Stewart Glitter on the snowballs. I love the new Pinefeather color and to add a little something to it, I stamped a pattern in Versamark with the Holly Jolly border and a snowflake from Snowflake Serenade with a little stitching around the edges. Thanks for taking a look at my little snowman card!

Sunday, November 21, 2010

Papertrey Ink November Blog Hop- Holiday Tags

Happy Thanksgiving to all my PTI friends! This blog hop has been my favorite this year because our challenge was to create some holiday tags, a task I love to do. Tags are fairly simply to create and I wanted to challenge myself a bit, so I remembered an issue of PaperCrafts Magazine ( Card Style). This whole magazine was dedicated to finding your Card-Making Style among four very different styles. I challenged myself to create a tag in each one of the four styles, Fun & Cute, Clean & Graphic, Classy & Elegant and Shabby & Vintage. I was able to create the first three tags very quickly and easily as those styles are the ones I am most comfortable with. The last one, however (Shabby & Vintage) took for-ev-er! It is the style I struggle with the most and almost never make a card in this style (actually this is the second) I used lots of PTI stamp sets as well as a music stamp from Stampendous called Music Score to make all of these tags and I have to admit the very first one, with the little stocking, white cotton balls and mini green clothespin is my favorite. I loved making the background paper using a sentiment in Tiny Treats Christmas. The clothespin was dyed with green food coloring. Enjoy the blog hop and Happy Thanksgiving to all.

Wednesday, November 17, 2010

Christmas Tag #3 of 12

I've been making tags, tags and more tags. This tag is #3 in a series of 12 and I made 100 of them! Again. I have more than gotten my money's worth from my Tag Sale #1 die, Woodgrain stamp set and Peace Be Still Dies. I went through 2 rolls of Vintage Cream felt making the doves and I don't know how many red beads. I love how this one turned out. The sentiment is embossed and in person is so bright and shiny. I love the feeling I get when I have completed all the steps it takes to make so many identical tags. Making tags are definitely running a very close second to my love of cardmaking.

Sunday, November 14, 2010

Bookmark

I would like to thank Michelle for organizing the very large purchase of bookmark plastic sleeves for all of us. I got my sleeves yesterday and decided to make a Christmas bookmark, FOR MYSELF. I rarely make anything that I keep and use for myself, but I will definitely be making lots of bookmarks now. For this bookmark, I made my own patterned paper using lots of Christmas sets from PTI. I have been wanting to use the new Blueberry Sky paper and since I was using the largest bookmark sleeve, all I had to do was cut a rectangle 2 1/2 x 7" and start building my pattern. I used Holly Jolly and Snowflake Serenade stamp sets. I have found a perfect ink match for the new Pinefeather paper too that is perfect to stamp the holly images onto. It is Adirondack Ink "Bottle". I saw a card that Debbie Olsen created and she was nice enough to share the ink color with me. It comes in both dye and pigment ink and since I want to be able to use it for embossing, I got the pigment type. It is beautiful and stamps so nicely. Something else I would like to mention is about the vellum I stamped the Vintage Label image on. I had never owned any PTI vellum, thinking that velllum was, well vellum. It's not. PTI's vellum is so much nicer than the vellum I usually buy in my local craft store. It die cut with Spellbinder Labels so crisply and I slightly heat-dried the images to make sure they would not smear. I used a glitter pen, stickles and some rhinestones to bling up the front and back of the bookmark, tucked in the plastic flap, puched a hole and added a little ribbon and a button to finish off the bookmark. I love it. Wish I had some Christmas themed book to read with it!

Friday, November 12, 2010

Clean and Simple Christmas Cards

Today I made two clean and simple Christmas cards using Framed, Friendship Jar Holiday and 2010 Holiday Tag sets. One is a single layer and the other has just one layer of patterned paper. I used some gold embossing powder to add a little sparkle to the snowflakes. Such a simple card to make.
Card Size: 4 1/4 x 4 1/4

Sunday, November 7, 2010

Christmas Tag #2

I have been making Christmas tags all weekend. For tag #2, I used 2009 Holiday Tags along with the Tiny Treats Christmas Mat Stack stamp and the Limitless Labels Doily Lace die. Stamped in black and colored with some copics, red/white twine and a some stickles for sparkle, this tag was very easy to create, which I did 100 times! The hardest part was cutting out the tags and labels on my cuttlebug. Wish I had that electric Big Shot!

Monday, November 1, 2010

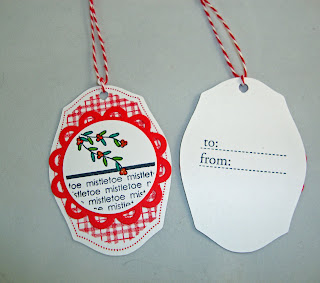
The first of many gift tags

Today I have the first of a great many gift tags I am making using lots of PTI products. Although this first one's image is not a PTI stamp, almost everything else is! These little tags look so quick and simple although there was a lot of steps to make them. The picture is of the front and the back of the tag and doesn't show it very well, but they are embossed with the linen impression plate and have lots of sparkly Prisma glitter on them. The button is one of my new Pinefeather buttons, a beautiful color for Christmas projects.
Details:
Paper: KraftInk: Dark Chocolate
Stamps: Rubber Stampede (Cardinal), To/From:Friendship Jar Christmas Fillers
Extras: Linen impression plate, copics, prisma glitter, plaid ribbon from Michaels, stickles

Thursday, October 28, 2010

Halloween Birthday

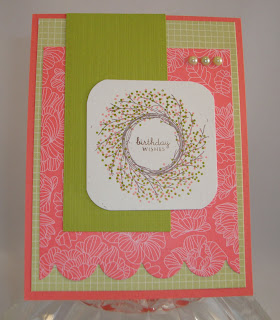
My daughter's birthday is on Halloween and she has always loved mixing Halloween and her birthday celebration. Her card this year is a bit of both. It was fun for me to try to piece the words Halloween Birthday onto her card using several different sentiment sets. A Wreath for All Seasons is such a versatile set and I thought it was fun using the cute little Halloween brads as accents on her birthday wreath.
Details:
Paper: Plum Pudding, miscellaneous Halloween patterned paper from Target
Stamps: Wreath for All Seasons, miscellaneous $1 stamps from JoAnns
Ink: Simply Chartruese, Plum Pudding, Orange Zest
Extras: Halloween Brads, Woodgrain impression plate, Mat Stack #4, black zig zag stitching

Thursday, October 21, 2010

Extra-long nesties for sale

I have a set of Small and Large Extra-long Nestabilities (Regular and Scalloped) for sale: All 4 sets for $50 PTI cert and I will ship free to US. My email is CWeber2002@aol.com

Saturday, October 9, 2010

Taylored Expressions Sketch Challenge-TESC131

Hi Crafty Friends: I love that expression! Speaking of expressions, today I have a card I made for the Taylored Expressions Sketch Challenge 131 using PTI's Wreath for All Seasons http://tayloredexpressions.blogspot.com/2010/10/taylored-expressions-sketch-challenge_08.html I was inspired by Lynne on the PTI forum who posted a cute card using this sketch and the wreath set, so I decided to play along and use my new wreath set to create a birthday card for my niece. Here is a link to Lynn's card which was my inspiration: http://thequeensscene.blogspot.com/2010/10/tesc131-wreath-for-all-seasons.html This wreath set is so versatile and goes way beyond just a holiday wreath image. I paired it today with some In Bloom and Bitty Box patterned paper. I can see me recreating this card in many different color combinations. I used a tiny sentiment from Mixed Messages stamped in the center of the wreath to say Happy Birthday. I had such a fun time making this card which really reinforced why I love to stamp and make cards. I was happy just stamping all the pretty colors together. Thanks for taking a look.
Details:
Paper: Berry Sorbet, Simply Chartruese, Rustic White, In Bloom and Bitty Box patterned paper
Stamps: A Wreath for All Seasons and Mixed Messages
Ink: Memento Rich Cocoa, Berry Sorbet and Simply Chartruese
Extras: Linen Impression plate, medium scalloped die (PTI) Corner rounder, pearls

Saturday, October 2, 2010

Stamp Simply #159-Three is the Number

This little card is for Stamp Simply #159-Three is the Number Challenge. For more about this challenge, look here: http://notimetostamp.blogs.splitcoastampers.com/2010/09/30/stamp-simply-159-three-is-the-number/ We were to make a card with either 3 images or 3 panels. I actually did both and threw a little sewing and embossing in as well. I have been wanting to use PTI's Star Prints on a masculine card and since my Dad's birthday is in a few days, I broke out the stars. The stars are embossed with clear embossing powder and the Ocean Tides card base is impressed with the linen impression plate. Hopefully the stitching is not too girly, but I love how it gives the three panels a very finished look.
Details: Paper: Ocean Tides, Terracota Tile, Library Ledger, Vintage Cream\
Ink: Terracota Tile, Versamark
Stamps: Star Prints, Just the Ticket
Accessories: Stitching and clear embossing powder, dimentional dots

Monday, September 27, 2010

Embellish Magazine Color Challenge

Today's card is for Embellish Magazine's Color Challenge. This challenge was to use black, gray, white and yellow as well as to stamp your own background. I rarely use Asian Fusian, but love the clean sleek lines of the backgrounds stamps in it. I have always loved them stamped in black on white cardstock. I distressed the edges a bit and make a quick mat with smokey shadow cardstock and the PTI Mat Stack #4 die impressed with the woodgrain impression plate. I hope you will notice the yellow/white twine from Divine Twine. It is a great match for Lemon Tart or even better for Summer Sunrise papers and inks. Thanks for checking out my card today.
Details:
Stamps: Asian Fusian
Ink: True Black and Lemon Tart
Paper: White, black, smokey shadow
Extras: Woodgrain impression plate, mat stack #3, edge distresser and yellow/white divine twine

Moonlight Creations Blog Candy Giveaway

Check out this great giveaway of PTI products from Moonlight Creations www.moonlightstamper.com/blog/papertrey-blog-candy

Saturday, September 25, 2010

Papertrey September Blog Hop Challenge- Thanks Pat Doyle

Tonight is the monthly PTI Blog Hop. Our challenge this month was to use a technique that you learned from someone else. I didn't actually learn a technique, but I did discover how to make a project I have never made before. I would officially like to thank Pat Doyle for the inspiration as well as some of the supplies to make a 4" coaster calendar. This month PTI released a really cute calendar set and during the previews, Pat shared on her blog the fantastic coaster calendars she has been making for the past few years. Here is the link so you can check out her great designs.
I contacted Pat and she graciously not only told me how to make the calendars, but sent me some samples and included some blank coasters and also the rings! That was a fun package to open. For my project, I knew I probably would not have time to create an entire calendar in time for Christmas gifts this year, so I decided to get a very early start on 2012. Tonight I have the cover and the first month to share with you. I used several of my PTI stamp sets and have lots of ideas for future month pages. I am going to make 5 calendars and plan to try for one page per month which should get them done in plenty of time for Christmas, 2011. I hope you all will go check out Pat's blog and I know you will enjoy looking at her very creative calendars.
Details: Paper: Pure Poppy, Aqua Mist, Kraft, vintage cream, Dotti Biscotti
Ink: Pure Poppy, Dark Chocolate, Versamark
Stamps: Polka Dot Basics, All Booked Up, Fresh Alphabet, Fly Away
Extras: Mat Stack #3, Linen Impression Plate, Aqua Mist ribbon, Stampendous Embossing Powder, Swiss Dot embossing folder

Thursday, September 23, 2010

Tag Die Happy Birthday

I made a card today using PTI's Tag Die #1. This die is so much fun to use and just stamping random images on them can make for a lot of fun. Beautiful Blooms II images stamped in three colors with a small leaf image from Turning a New leaf on this tag became the focal point. The sentiment was stamped in True Black ink. The base is kraft embossed with a cuttlebug folder. It's Official and Dotti Biscottii Paper in a very simple layer and a few little rhinestones is all this card took to complete. I used a little bit of my new twine from Divine Twine in a color that is really close to Summer Sunrise. It also looks nice with lemon tart. Thanks for taking a look.

Wednesday, September 15, 2010

Waiting for "Framed"

Last night was PTI's September Release and I used amazing restraint and only bought one stamp set. I was so inspired by Nichole's card here: http://nicholeheady.typepad.com/capture_the_moment/2010/09/introducing-framed.html
My husband asked me to make a card for him to give to a co-worker who just received a promotion. He has never asked me to make a card for him before, so when he did, I immediately thought of Nichole's card. He needs the card right away, so I couldn't wait until I get my new set, so I tried to draw the lines myself. Not good. Then I remembered the frame image in Take Note. It is longer and more narrow than the frames in Becky's set, but I thought it might work in the meantime. I masked off an area for the sentiment. That's another story. My husband didn't want any of the really cute sentiments I have, only the words Congratulations. I thought it was a bit long for this frame, but in the end, I think the card turned out like pretty similar to the one Nichole created. I bought the pretty flowers at Michael's and adhered them with glue dots. The edges of the cream mat are inked with Tea Dye. Thanks for taking a look!
Details:
Stamps: Take Note, It's Official
Ink: Dark Chocolate, Scarlet Jewel, Tea Dye Chai
Paper: Rustic Cream, Scarlet Jewel
Extras: Prima Flowers

Sunday, September 5, 2010

Embellish Magazine Challenge

Today I made a card for Embellish Magazine Color Challenge. I have posted the inspiration piece and the specifics which were to use black, green and purple with the additional request to use squares. Those three colors scream Halloween to me, so that is what I decided to create. I cannot believe I made this card with no stamping, absolutely none. That is almost unheard of for me. I used some papers I got last Halloween from Target and a cute little spider sticker that I had in my Halloween box. I did use PTI paper and it is difficult to see, but I used the picnic plaid impression plate which has lots of little sqares on it. I also realized the last couple of card I have made have been square (4 1/4 x 4 1/4). I am going to have to switch that up on my next card. Thanks for taking a look and making a comment.
Paper: PTI True Black, various Halloween papers (Scrapbooking Supplies, Spooky Collection) and sticker (Ellen Krans soft spoken Trick or Treat)
PTI Picnic Plaid Impression Plate

Saturday, August 28, 2010

Thankful for YOU, Nichole

This card is for you, Nichole in honor of the first PTI Nichole Heady Appreciation Blog Hop:
For 28 years, most of my identity has been as a mother. My two oldest sons are both living on their own, married and in their own homes and my daughter is in college. For the last couple of years I have really struggled with "letting go", which is the way it should be. I have done a good job as a mom and am proud of the adults my kids have grown up to be. But...what do I do now?
This is where you come in Nichole. I discovered PTI and your Capture the Moment blog. With it, I found something interesting, fun and creative that I can do with my time that fills up a little bit of space that my day to day mothering used to take up. I have things to look forward to every day that are centered on me, Cathy rather than on me, Mom.
I probably will never meet you in person, although someday I hope to. Your blog, your cards, your videos, and your wonderful company has given me so much pleasure, excitement and enjoyment of life. Because of you, Nichole, I have met so many wonderful people on the PTI forum. I absolutely love reading about and talking about everything PTI and your readers are the most thoughtful and encouraging people I have ever known.
Thank you Nichole for touching my life in such a positive, meaningful manner and for bringing such a big smile to my face on a daily basis. This is obviously not just a job for you, just as it is not just a hobby for all of your readers. I appreciate you and am so thankful for YOU.

Tuesday, August 24, 2010

A Star Is Born

Lots of PTI goodness on this card today. Stamps, papers, dies, glitter, embossing powder and a little bit of computer work and messy stitching all mixed together for a sweet baby card. I used my Star Prints set for the first time and I used a little image from Favor It Baby on the Just the Ticket stamp set. It fits perfectly within the ticket frame. I tried very hard to make the computer printout line up within the library card frame. Did you notice there is some Night, Night Moon stamped on the Bitty Box Basics paper and on the Library Card Pocket? I have been challenging myself to really pay attention to details on my cards lately as that is what I always love about the cards made by the design team members. I'm not quite sure how I am going to fit this into an envelope though, those tickets stick out a bit on the sides.
Details:
Stamps: Night, Night Moon, Library Card, Just the Ticket, Star Prints, Favor it Baby, It's Official
Paper: Enchanted Evening, Spring Rain, Rustic Cream, Bitty Box Basics
Ink: Spring Rain, Enchanted Evening, Versamark
Accessories: Prisma Glitter, White Embossing powder, Library Card Pocket Die, Just the Ticket Die, stitching

Saturday, August 21, 2010

My Favorite Card (Still is)

****This post is for the PTI Anniversary contest.  We were to post our very favorite card made with PTI products.  When I made this card, the post title was "My Favorite Card".  It still is today.  I have used this layout many times, but always love this one the best.
So today I made a card that is my very favorite of all the cards I have made so far. I just got the Mat Stack #3 stamp and die and have been wanting to make it the focal point of a card. I love it! It lines up so nicely and was the perfect mat for a baby boy card using a little onesie stamp. I stamped the onesie three times and paper pieced it popping up each layer with dimensionals. I finally figured out how to stamp text style script getting it to line up correctly. Turns out the trick was stamping from bottom to top. I had always done it the other way around. For me, that seemed to be the key. I got to use my new PTI dark chocolate twine and also my linen impression plate. I love this card so much, I am going to duplicate it to give to my niece and keep this one for my craftroom card shelf. I love days like this when a card goes together just as you pictured it. I think I am going to start a link in the forum for everyone to share their most favorite card and tell us why it is their favorite. How fun would that be to see?
Details: Card Size 4 1/4 x 4 1/4
Paper: Spring Rain, Dark Chocolate, Rustic White, Bitty Dot Basics
Stamps: All Booked Up, Text Style I, Night, Night Moon from PTI, Onesie from Technique Tuesday Cute as a Button
Accessories: PTI Dark Chocolate twine, linen impression plate

Monday, August 2, 2010

Night Night Moon and Large Scallop Die

I love the baby set Night, Night Moon. I love the title. I love the border stamps, I love the cute little duck and diaper images and I love the sentiments. I love everything about that set. So, I was especially excited when I realized that both the diaper and the duck images fit perfectly within the large scallop of PTI's large scallop border die. I love it when you find an image that fits within one of the PTI scallop border dies. For this baby card that I am giving to my niece who is having a shower for her baby boy to be born in a few months, I started with a kraft base and stamped the duck, diaper, bottle and rattle border in dark chocolate several times. It is super easy to line up and can easily be matched for any length of card. Next I cut a scallop in spring rain with the large scallop die and adhered it to the bottom of the kraft base. I stamped and cut out the cute little duck from a variety of bitty dot papers. I stamped each image three times. I used some dimensional foam on the bodies and on the wing. I got to use my harvest gold felt with the ric rack die for the first time on this card too. It is so perfect for a baby card. I used Fillable Frame #1, a sentiment from Night Night Moon and Fresh Alphabet letters to spell out the baby's name on the frame. The finishing touch was one last duck image cut out and adhered to the label. I am so happy with the way this card turned out.
Details:
Paper: Kraft, Spring Rain, various Bitty Dot Basics
Stamps: Night Night Moon, Fillable Frame #1, Fresh Alphabet
Ink: Dark Chocolate, Pure Poppy, Enchanted Evening
Accessories: Large Scallop Die, Harvest Gold Felt

Saturday, July 31, 2010

Library Card Pocket

Just a quick post today to show the inside of a card I made using the Library Pocket die. Several people on the forum have asked some questions about the pocket die and I wanted to show how I have used it. I cut the pocket with orange zest cardstock and adhered it to the inside of my card. I cut a 2" scallop circle with In Bloom cardstock and a 1.75" circle stamped with one of the Round and Round Flower images. I colored the image with copics and stamped a sentiment with Birthday Bash Sentiments. I think this is really nice way to present a gift card, much nicer than just setting it inside the inside of the card.
Just an FYI about this die: Patterned paper tends to have the fold lines cut through with this die. To prevent that from happening, cut two pieces of paper at once. 1st layer should be cardstock, second layer should be patterned paper. That has worked for me every time. Thanks for taking a look today.

Monday, July 26, 2010

Papertrey Pals and Clean and Simple Challenge

Today I covered two challenges with one card, Papertrey Pals (see the details here:) http://www.papertreypals.blogspot.com/
and Clean and Simple Stamping (See their details here:)http://cleanandsimplestamping.blogspot.com/.
Papertrey Pals Challenge #13 was to create a card using a stamp you have never, ever used before and Clean and Simple Stamping is celebrating their 100th sketch. Whoo Hoo! So, first I dug through my PTI stamps and found the Fruitful set. I just got this in a trade with Lorin (PTI name). I envisioned using it with my jar set, but it is really scaled too large for that. I do love those pretty, colorful fruit images and just had not yet figured out how to work them into a card. I also used two sentiments that I had never inked up yet. The sketch from Clean and Simple Stamping was very easy to picture as a card. Not so eash for me to execute though. Turns out stamping Pure Poppy on white cardstock evenly and without any smudges is not something I am very good at. For a Clean and Simple card, I ended up using up 3 pieces of white cardstock and it is still not "perfect". I used the strawberry images as the scallop in the picture and the Thank You sentiment as the ribbon. After I messed up so many times, I was really worried about running it through my cuttlebug with the linen impression plate. Thank goodness it worked and nothing smeared. I feel good that I finally used my fruitful set, but think it will be a long time before I use it again stamped so many times on one piece of cardstock. Too much opportunity to make a mess.
Details:
Paper: PTI White
Stamps: Fruitful, Fillable Frame #6, Signature Greetings
Ink: Pure Poppy, New Leaf, True Black
Accessories: Backside of the Linen impression plate