Pages

Showing posts with label Waltzingmouse Stamps. Show all posts

Monday, July 14, 2014

Top Dog Dies: Nautical Diaper Card


In the next few months it will become very clear to everyone who reads my blog that we have a little grandson on the way...so, baby boy cards will be popping up all the time.  Pink girlie cards?  Not so much!  I do have to say that my daughter-in-law is quite the girly-girl and loves bling, so even though I won't dress our baby in rhinestones...his mother's cards will still sparkle!

Today's card was such fun to make and also very easy using Top Dog Dies Diaper Card A2 Die and Diaper Card Finishers Die Set.
I used WPlus9 Dockside Background stamps to create a nautical pattern onto the basic diaper die cut.  Super easy...and I used coordinating card stock for the back and sides of the diaper.  Those cute safety pins are also from Top Dog Dies (Top Dog Dies Onesie Card Finishers Dies).  I cut them from white card stock and used a copic marker to add the red trim.  I also added some glossy accents to the red to make them dimensional and more realistic.  I used Waltzingmouse  Stamps Tying the Knot stamps for the rope border and spray painted some metallic anchors red and added them as safety pin embellishments.  Lastly, the bling I added for my daughter-in-law...just because she loves it!

Wouldn't this card make an adorable baby shower invitation for a nautical themed shower?  I am quite sure I will be making a lot more of these as the time gets closer for my grandson to be born.


Wednesday, July 9, 2014

Card Concept Challenge #14: Colors


Hope everyone in the United States had a great 4th of July holiday and have been enjoying the beautiful warm weather.  Card Concept #14 has a fun challenge for you today...a color challenge.
I have a feeling this is going to one of our most popular challenges so far...just look at those bright, summery colors!  In addition to the colors, I picked up on the cute feathered comforter in the inspiration photo.
Here at the Card Concept challenge, I represent the Freestyle Collage style of cardmaking which includes:
                                                        Unrelated elements in a collection
                                                        Can be done in any style

I used a Blueprints Die set from My Favorite Things Stamps (Blueprints #15) and had a blast arranging and rearranging all the elements until I had just the right look.  I used Waltzingmouse Stamps Funky Feathers to stamp the bright blue pattern and an Impression Obsession Distressed Dots Cover a Card stamp for the red polka dots.  Don't those feathers look just like the ones in the inspiration photo?

If you've never played along with Card Concept challenges, all you have to do is be inspired by the photograph and create a card using one of the following six card making styles.

             Clean and Simple 
               Clean and Layered 
                                                        Clean and Graphic
                                                        Freestyle Collage
                                                        Shabby Chic
                                                        Classy and Elegant


You have two weeks to link up your card over on the Card Concept blog.  The challenge ends on Monday, July 21st at noon PST.  

Thursday, April 24, 2014

Fusion Challenge #8


Today's Fusion Card Challenge #8 is a bright and cheery one...just look at this photo and sketch:


I had no hesitation this week...I knew from the minute I saw this picture that I was going to base my card on the rainbow of chevron colors.  
I used Waltzingmouse Stamps Funky Feathers stamp set and brought out an array of ink colors as close as I could get to the ones in the inspiration photo.  Notice the chevron pattern in the feathers?  How cool is that?  The birthday die cut is from Papertrey Ink as well as the inked "Happy" stamp.  It is a very rare day when I make a card that can actually be sent through the mail and I am happy to say this one definitely qualifies.

I am hoping you will want to play along with our challenge...just make a card based on either the sketch, the inspirational photo, or a little bit of both for perfect "fusion"!  You have two weeks to play,  the challenge ends on Monday, May 5th, noon PST.  Here's some more inspiration from the Fusion Design Team!

Thursday, March 27, 2014

Fusion Card Challenge #7

Welcome to another Fusion Card Challenge...have you seen the winners for Challenge #6?  We had so many fabulous cards submitted again...it was so difficult to choose a favorite!  Check out the winners here.
Now...on to Challenge #7!  What do you think of the inspirational photo and sketch?
1

Here's how to play along:

PROCEDURES:
1. Play with just the sketch challenge.
2. Play with just the inspiration photo challenge.
3. Or you can create FUSION by combining BOTH challenges into one card.
4. Use the challenge graphic and link back to Fusion in your post.
5. Please read the other considerations on the Our Rules Page before playing along.

I based my card on the sketch this week...I loved that oval in front of the two rectangles in the sketch.  I've been waiting all year to use my Waltzingmouse  A Good Egg stamps...last year I got them too late for Easter, so it was like using a brand new stamp set!
3
I used a couple of notebook dies and stamped a bright pattern with a few of the stamps from A Good Egg.  For the oval portion, I used one of the cute Easter Eggs and matching cut files that go along with the set.  I also used a cut file to cut out that sweet bunny and banner.  I wanted to bring out more of the green color so I added a small vine die cut from Poppy Stamps.  I clipped all the elements onto each other with a mini clothes pin.   This was such a fun card to make.

So...what will it be for you this week?  The Sketch, the photo or a combination of both?  You have until Monday April 7th at noon PST to submit your card...can't wait to see what you come up with!

Check out what the rest of the Fusion Design Team have made with this week's challenge:


Wednesday, January 22, 2014

Card Concept #2: Add Texture


Today is a very big day for me...my first day on the Card Concept Challenge Design Team.  I am beyond excited to be one of the Classy and Elegant style designers for this brand new challenge and believe me, I know how lucky I am!   Anyone who has ever seen my cards might be doing a little double-take right about now.   Most of the cards I make are in the Clean and Layered design style, after all I live in a town whose motto is "Horsetown USA".  My idea of classy is drinking beer... from a glass.  Frosting the glass in the freezer...elegant.  Setting it on a coaster... bumps it all the way up to regal, so Classy and Elegant cards are going to be a bit of a stretch for me.   That's why the Card Concept Challenge is going to be such great fun for every card maker.  Every challenge,  the design team will share two examples of six different card styes and you can use any one of them to make your card.  I think you will be surprised to see how many qualities each style has in common.
Here are the six styles and a link for more information about each style:


For Challenge #2, we have a beautiful inspiration photo and a challenge to use texture on our card.
I drew my inspiration from the texture on the roof and the red and white color of the house.
I based my card around a beautiful sentiment stamp from Waltzingmouse Stamps (Safe Harbor Sentiments embossed in gold.  I layered the sentiment onto a couple of Spellbinders Floral Ovals.  The texture on my card is some jute wired ribbon that I spray pained gold to make it a little more elegant.  The burlap ribbon is also spray painted.  The background patterned paper is stamped with Waltzingmouse (Pinstripe Backgrounder).  I added a gold bow and some charms...you guessed it, spray painted gold to match the ribbon.  
Classy and Elegant not your style?  I guarantee you will find something that is just right for you when you check out the other cards made by the Card Concept Challenge Design Team.  Challenge #2 lasts for two weeks, plenty of time to make a card...or two!  The challenge ends Feb. 3rd at noon, PST.  The winners will be revealed on Wed. Feb. 5th.  I hope to see your card in the gallery very soon!

Thursday, December 12, 2013

Merry Monday Mittens


Less than two weeks from now, the Christmas season will officially be over...too soon for me as Christmas cards are my very favorite cards to make.  Luckily, there is a card challenge that will allow me my Christmas "fix" all year long.  I have just discovered the Merry Monday Challenge where this week's challenge (Merry Monday #87)  is to use a mitten somewhere in your card design.  I am also playing along with ColourQ 219.  The colors this week are perfect for Christmas...I had so many pieces of patterned paper in my Christmas stash, I didn't need to search too long to find just the right combination.  Here is this week's ColourQ palette.
When I think of mittens, I always think of my the sweet stitched mittens from Waltzingmouse Stamps, Sewing Box Christmas.  I love the sweet stitching and how many different looks you can achieve when stamping them on patterned papers.  

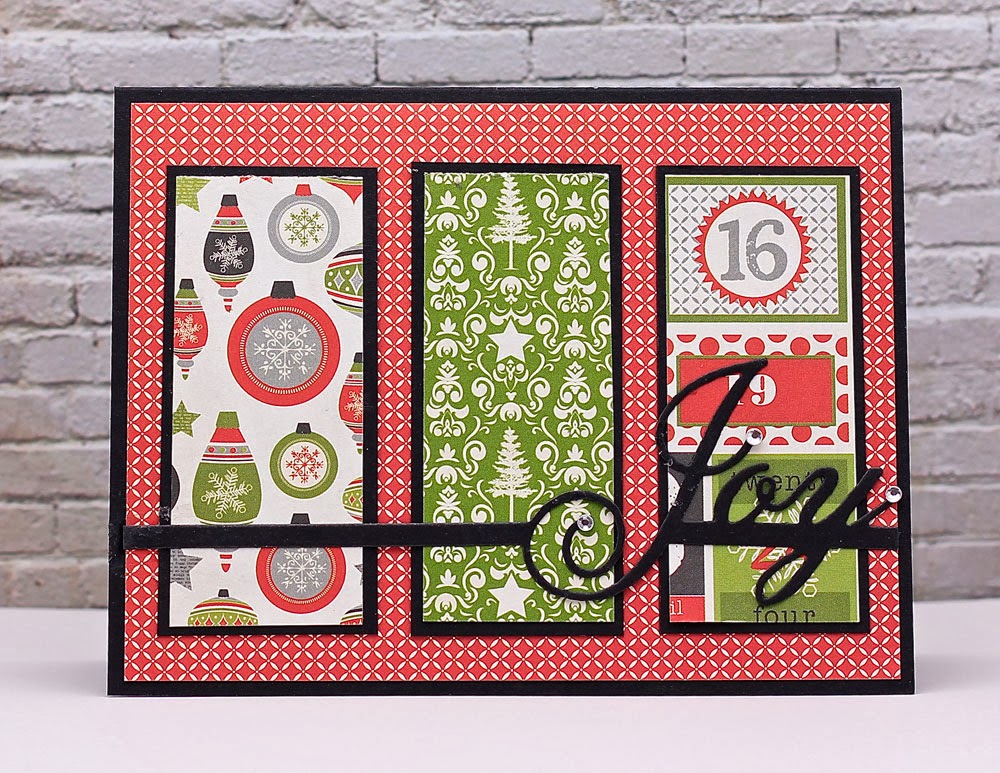
 I told you this weeks ColourQ palette was a good one...didn't I?  I used some Recollections patterned paper (Sugar Plums) and some red hand stitching to bring out the red colors in the patterned paper.  The stamps and sentiments are from Waltzingmouse Sewing Box Christmas which I stamped and embossed in a deep, rich brown.  The cute little stitched sentiment flags, stitched mat circle and square are from Lil Inker Designs.  My final touch were the cute little jingle bells tied with brown twine.

Are you still working on your Christmas cards?  If so, here's a link to the Merry Monday Challenge and if you are all done for this year...it's never too soon to get started on cards for Christmas, 2014!

Saturday, November 30, 2013

12 Kits of Occasions - November with Kelly


***There's a prize up for grabs - Read about it on The 12 Kits of Occasions blog***

It's the 30th of the month and time for November's edition of The 12 Kits of Occasions.  You can find us on our blog, Facebook and our Pinterest page (I especially love seeing all the cards made this year grouped together all in one place).  This month our hostess is Kelly of Gingham Girl and wow did she come up with a great kit for us this month!  In true Kelly style, our kit was packaged in a gingham bag...I won't be surprised if I see that bag or pieces of it included in someone's project this month.  Here a peek at the cute kit we all received from Kelly.


Can't you just imagine all the fun we had with this one?  I love the color combinations Kelly sent us...red and black as well as the traditional red and green.

My first card is my favorite.  I love the little dog and matching sweater.  I also added a little bell and red sparkly collar to go with the cute sentiment.

My second card uses some of the beautiful patterned papers and one of the PTI One-Liner die sentiments.


My third card took advantage of the snowflake embossed panel that Kelly sent us and I added some Lil Inker glittery snowflakes.


This fourth card has one of my favorite Christmas sentiments all stamped in white with the chalkboard look.


My last card also uses some of the beautiful patterned papers and bright red Waltzingmouse ornament.  I used my Lil Inker Stitched Mat Circles for the base and I'm loving the gray, white and red combination.

Didn't Kelly send us a great kit?  You are going to be amazed at all the creations the other girls in our 12 Kits of Occasions group have made.  In fact, I heard Joyce made 15!  Can you believe that?  15 cards and who knows how many more she made before she was finished! 

Thank you Kelly for a great kit this month!

More details on this kit are located on the 12 Kits of Occasion Blog.

Friday, October 18, 2013

Waltzingmouse October Pajama Party

I've got my pj's on and am ready to check out some Halloween cards...Waltzingmouse-style.  No one does Halloween better than Claire and her latest release gave us lots of stamps to choose from to create some spooky Halloween cards.

I am playing along with the challenge to create a Victorian or vintage style Halloween card.   Totally not my normal style, rarely do I use anything Victorian or vintage, but I do have a new stamp set to play with and it didn't take long to find an image to go with it.  I'm talking about Waltzingmouse's Spooky Tree Backgrounder.  Here's my entry into the Victorian Ghost Challenge category:
I also used my cameo on this card...the ornate frame is a cut file and the raven is a print and cut.  I stamped my Spooky Tree background on a piece of patterned paper and adhered a sheet of vellum on top of it.  The sentiment is embossed onto the vellum and is from last years Waltzingmouse set, Hocus Pocus.  I added a big poofy bow, some stitching, stickpins and a button/brad combination.

There is plenty of time to play along with this month's challenges...here's a link for all the details.

Wednesday, October 16, 2013

October 4 of a Kind with Renee - Ocean Bound


Ahoy.  I am in quite the nautical mood today as I have had such fun making cards with our latest 4 of a Kind kit...this time hosted by Renee of It's a Patchwork Life.  You should have seen the gigantic, enormous, packed to the brim package we each received this month.   Here's a snapshot of our package:


As you can see, I was not exaggerating!  I made six cards with my kit and when I packed away the left-overs, my package was still full enough to make at least another six or so.  Here is what I made:


I am starting with my favorite.  I love the little whale and used some pieces left over from the Lil' Inker fanfare die to make an eye and eyebrow.  I added some seagulls to the stitched clouds and plan to use this for my nephew's 3rd birthday card.


I loved the anchor-embossed card stock Renee sent us in our kit.  I used some of the patterned paper and Mat Stack #3 from PTI to highlight the ships wheel from our kit.  Those brass brads were fun to use too.


How quick and easy this card was to make.  I didn't even have to stamp the whale...it was a sheet of patterned paper I die cut with the Lil' Inker notebook die.  More seagulls and that polka dot washi tape...also included in our kit.

I cheated a bit on this card.  Renee challenged us to tie this knot ourselves, even giving us enough rope to do it.  Did I?  Nope.  I just cut off the belly band Renee put around our package this month.  It was just too good not to use.  

Every single pieces of this card came from our kit...love the anchor patterned paper and the Lil Inker Fanfare die again.  

I really love the navy and white on this one...the white strip is actually another piece of washi tape from our package and the background patterned paper was already rounded.  This last card really did practically make itself.  

Do you see why I had so much fun with this kit?  I can only imagine how great the cards are going to be from the other three members of our group.  For the complete kit ingredient list, make sure to check out Renee's blogpost.  We'll be back in January with something fun from Joyce!

Renee (Our hostess)

Thursday, September 12, 2013

Bats & Broomstick Frame

(Carly's birthday post is always a long one, I apologize in advance!)

As my daughter Carly's birthday is on Halloween, October 31st is pretty important at the Weber house.  Not only did my kids love decorating the house with all things scary, we also added in some birthday decor to go along with it.
I didn't become "crafty" until my kids were grown, so I was a little late to the game when it comes to making my own decorations, but the last several years I have made some type of Halloween project with Carly and her past birthdays in mind.  Two years ago I made this:


This was actually a card, but we saved it and will set it out every year.

Last year I made a birthday frame:


This was Carly's first Halloween

This year, Carly turns 22 years old.  I know!  How old does that make me?  Way too old, but at least I have a lot more time to play with all of my crafty goodies than I did when Carly was 8 years old as she was in the picture below.  As I looked back at Halloween pictures, I realized Carly was a witch for Halloween at least 4 times...so this year I focused on one of her "wicked" birthdays for my project. 

 Here is my 2013 tribute to Carly's Halloween Birthday:
I just received my new Lil' Inker September release stamps and dies and used them to make a dimensional frame.  I took out the hologram image that came with the 10 x 12" frame and created a scene of my own.  First I cut a frame border on my silhouette.  I scaled it so that the three boxes were the right sized to match a Lil' Inker Stitched Mat Square die (detailed picture of Lil' Inker's trademark stitching below).
For the largest square, I used Lil' Inkers new Bats and Broomsticks stamp set as well as the matching die.  Isn't the lined pattern on the stamp a great touch for the witch silhouette?
The bats also have that great lined pattern too.  

I also used a great sentiment from Bat's and Broomsticks.  All of the sentiments from this set a so different from the typical "kiddy" type Halloween sentiments and are perfect for us "older" witches.  I also added a scary looking tree using the Memory Box Grand Willow Tree die which I embossed with a woodgrain texture and used black ink to shade it up a bit.  The moon is die cut from cream glittered cardstock using Lil' Inker Stitched Mat Circles and the tombstones are also from Memory Box (Graveyard Landscape).  Several of these dies are popped up with dimensional foam and adhered to cardstock from MME (Wicked collection).

For the decorated squares along the side, in addition to Carly's picture, I used Lil' Inker's Rainbows and Clouds die to make a Halloween type rainbow cut from glittery cardstock.  

You can see the great stitched detail on the Stitched Mat Squares and cloud in this one.  I also added a few more bats.

For the last square, I had to add a spiderweb and black widow spider.  That story is much too long to tell, but Carly was bitten by one when she was 9 months old and it was a very scary time for us.  I always add something spider-related to her birthday projects.  

I even cut out Carly's picture with the Stitched Mat Square die...adds a little extra something to such an old photo.
That's it for this year...the frame is all ready to display when I drag out all of my Halloween decorations for the month of October.  Yes, even at 22, the entire month of October is still birthday month for Carly.  One of these days that will change and she will dread adding that extra year, but for now, her Halloween birthday is something we all look forward to.  Thanks for sticking with this very long birthday post.

Wednesday, September 4, 2013

You're a Lifesaver

I have a quick card with a long story to share.  I made this card for my good friend Kelley who truly was a lifesaver.  First, the card:
I used WM Oceanbound for the frame and sentiment and WPlus9 for the Life Preserver.  Very quick and easy card.

Now, for the story to explain it.  My friend Kelley was on her way to work when she saw a little kitten that had been hit by a car with a broken leg trying to get across a busy road.  She got out of her car, tried to pick up the kitten and in the process got pretty scratched up.  She drove this stray feral kitten to her veterinarians office because she could not stand the thought of the poor kitten laying by the road all day in the 100 degree weather.  When she got to the vet's, she went inside and got a cat carrier to prevent being scratched again.  When the kitten saw her, he dragged himself up into the dashboard of her car and would not come out.  Kelley had to take her car to the Toyota dealership, have the people there take apart her entire dashboard to remove the kitten.  They were fabulous and actually did it for free and took video of it too.  She then took the kitten to the vet and found out the kitten's front leg was paralyzed, not broken as she had originally thought.  The vet said the leg would have to be amputated and quoted her a price of $650 for this stray kitten who would do nothing but hide from her.  She called her husband and he has a huge heart.  He told her to go ahead and get the kitten fixed up and they would figure out what to do with him later.  They named the kitten Lt. Dan for the character in the movie Forrest Gump.  The kitten went home and refused to come out or eat for two solid days.  Finally, they were able to feed it some baby formula with a syringe and he finally started eating.  He has turned out to be the best kitten...loves to be held and cuddled, purrs all the time, gets around just fine on 3 legs and has made everyone in the house happy they have him.  Our local newspaper even did a story on this and I am so proud of my friend and her husband.  This is the card I made for her and it is so appropriate for my generous friend.

Friday, August 30, 2013

Waltzingmouse Pajama Party - August

Today is the second Waltzingmouse Pajama Party and I have made two cards with my new stamps, and did I have fun!  There will be lots to look at today, so I will get right to it.

First, Tie a Knot in it and Get Nauty.  (I combined two challenge categories into one)
I started with a Silhouette little boy romper cut file and decorated it with a variety of stamps from Waltzingmouse Tying the Knot and Oceanbound.  The cute striped pattern is one of the ropes and stamped over and over makes a pretty cute little pattern.  I also cut a pocket with the stripes running in the opposite direction.  The sentiments and ship's wheel were cut out from Claire's matching Oceanbound cut files.  They take all the guess work out of cutting around a sentiment...they are sized perfectly.

PICTURE REMOVED FOR PUBLICATION

My second card uses the Color Inspiration Photo.

I used my new Two Step Floral Sprig stamps for my card.
I have to admit I have had several "step" flowers stamps and ended up selling them all because I could not line up the stamps properly.  I am happy to say I finally have a keeper!  This set is so easy to line up, even I could do it.  I also used the matching Two Step Floral Sprig cut files and Waltzingmouse Chicken Wire for the subtle background.  I added a sentiment from Folk Art Labels #25 and a Fanfare Scalloped Border Die from Lil Inker.

You have a whole 24 hours to link up a card of your own for the Pajama Party...there will also be a bedtime story sketch posted to wrap up the party.  Why not play along?  Here the link.