Showing posts with label Silhouette. Show all posts
Wednesday, September 3, 2014
Card Concept #18: Back to School
Welcome to the Card Concept Challenge #18, a theme challenge this week and very timely for the first week of September. Back to School is our theme and as my daughter is a brand new first time teacher this year, I knew my card would be something I can give to her to cheer her on and encourage her as she begins her teaching career. Here's the picture we had to work with along with the Back to School theme:
I loved the traditional "apples for my teacher" and overall colors in the photo. I actually have very few stamps or dies that fit for a school theme, but I do have a Silhouette and there were a ton of cut files that fit this week's theme. Here's my card for the very special teacher at my house:
Isn't that the cutest little pencil? I used a large alphabet embossing folder and a clipboard cut file along with a traditional apple and paperclip. The notebook paper is a die cut from Papertrey Ink as is the cute sentiment from Vintage Picnic. I am going to tuck this card into her plan book she brings home every night and hope that she doesn't find it until she opens it up at work. It makes me so proud to see her accomplish the goal she worked so hard to achieve.
Ready to make a school themed card of your own? You have two weeks to play along with the Card Concept...the contest ends on Monday, September 18th at noon, PST. I hope to see your card in our gallery very soon!
Tuesday, December 17, 2013
Merry Monday Challenge #88 - Use An Animal On Your Holiday Card
Merry Monday Challenge #88...use an animal on your holiday card. How about using an animal FOR your holiday card? LOL. That is what I did today. I love shaped cards...they are always so different and a little unexpected for the person who opens up the envelope. The Merry Monday Challenge for this week is to use an animal and since I didn't have too many cute little animal stamps...I decided to use a reindeer cut file from the Silhouette store and convert it to a shaped card. First though, here's the inspiration photo for Merry Monday #88:
I sure wish I had some cute owl stamps to use...(Joyce, this one is right up your alley!). Since I didn't have any owl stamps, I looked through the Silhouette store and found a very cute reindeer file I could use instead (Reindeer Face, Silhouette Store, ID #14808 by Sarah Bailey).
It was very easy to make a shaped card by inverting the shape and welding the top together slightly. I cut all the pieces from patterned papers...embossed the reindeer face with an embossing folder...added a lot of tea dye stain to the edges. I drew a Santa Hat freehand, cut it out and cut little holes for the antlers to peek out from under the hat. The cute sentiment is from PTI Santa Stationery. The last touch were those little jingle bells so everyone can tell just when this little guy has arrived.
I have already mailed out my cards for this year, so this little guy is going in the Christmas 2014 box. Wow...only 374 days until next Christmas! I better get going. Check out all the sweet animal Christmas cards at the Merry Monday Challenge Blog.
Friday, October 18, 2013
Waltzingmouse October Pajama Party
I've got my pj's on and am ready to check out some Halloween cards...Waltzingmouse-style. No one does Halloween better than Claire and her latest release gave us lots of stamps to choose from to create some spooky Halloween cards.
I am playing along with the challenge to create a Victorian or vintage style Halloween card. Totally not my normal style, rarely do I use anything Victorian or vintage, but I do have a new stamp set to play with and it didn't take long to find an image to go with it. I'm talking about Waltzingmouse's Spooky Tree Backgrounder. Here's my entry into the Victorian Ghost Challenge category:
I also used my cameo on this card...the ornate frame is a cut file and the raven is a print and cut. I stamped my Spooky Tree background on a piece of patterned paper and adhered a sheet of vellum on top of it. The sentiment is embossed onto the vellum and is from last years Waltzingmouse set, Hocus Pocus. I added a big poofy bow, some stitching, stickpins and a button/brad combination.
There is plenty of time to play along with this month's challenges...here's a link for all the details.
I am playing along with the challenge to create a Victorian or vintage style Halloween card. Totally not my normal style, rarely do I use anything Victorian or vintage, but I do have a new stamp set to play with and it didn't take long to find an image to go with it. I'm talking about Waltzingmouse's Spooky Tree Backgrounder. Here's my entry into the Victorian Ghost Challenge category:
I also used my cameo on this card...the ornate frame is a cut file and the raven is a print and cut. I stamped my Spooky Tree background on a piece of patterned paper and adhered a sheet of vellum on top of it. The sentiment is embossed onto the vellum and is from last years Waltzingmouse set, Hocus Pocus. I added a big poofy bow, some stitching, stickpins and a button/brad combination.
There is plenty of time to play along with this month's challenges...here's a link for all the details.
Monday, September 30, 2013
12 Kits of Occasions - September with Kim
(Make sure to check out our Pinterest board here)
I'm back. After an 8 month break, I am so excited to be back in the 12 Kits of Occasions club where every month a group of 12 crafters take turns hosting a themed card kit. Although I am glad to be back, I'm so sorry it took a sweet friend (Jeanne Jachna) leaving in order for me to do so, but I plan to make the most of this opportunity.
When I opened my package of goodies from Kim Heggins, this month's hostess...I knew the kit was going to be something great...something cute and scary...something that was going to cause tons of card making ideas to swirl around in my head. It did! Want to see why?
Before I show you my cards...here's a little peek of the kit we had to work with this month:
![]() |
| Photo courtesy of Kara |
Look at all this! Didn't Kara take the best picture capturing all the great ingredients in our kit from Kim?
Here's the cards that I made with our September kit:
I think everyone must have had a Trick of Treat bucket at some point...I know every one of my kids had one and it was so much fun re-creating those buckets with all the cute embellishments that Kim sent us. I used Lil' Inker Stitched squares for mats and some black jute twine to suspend the buckets across my card. I pinked the edges of the chevron patterned paper from our kit and added my own die cut sentiment. First card done...about 1/2 hour total.
Kim sent us lots of die cut silhouettes in black and I used two of them to create quite the mess with glitter. I ran both die cuts through my Xyron, then dipped them both into black glitter. Wow, a mess, but totally worth it as they are so shiny and really dress up the cute bingo card Kim sent us. I also used a Cheery Lynn Polynesian Sails Oval cut from black...the bingo card fit perfectly over it along with more great patterned paper and ribbon from Kim. If you include the the clean-up of glitter everywhere...this one took about 45 minutes or so to finish.
For card #3 I tried to use up a whole bunch of the kit ingredients on this card...it is definitely a hand it to you kind of card because it has lots of pieces to it. This one is going to my little niece who loves to paste stickers everywhere. Her mother is going to love me for this one. I used a Lil' Inker Folded tag and one of the embellishments Kim had attached to our packages. It was too cute to not use it. I added a rhinestone and some of the twine that Kim sent us in our kits. That chevron ribbon also was in the kit and this one took about an hour to finish.
My final card is my favorite.
The trick or treat sentiment and the crow are Silhouette cut files from Kim and pairing them with the Impression Obsession Halloween Hill die cut made the creation of this card the fastest of them all. I love when a card just practically makes itself (as Joyce of Cards by the Sea) always says.
Thank you Kim for helping me to have a fun and creative Saturday! Ready to see some more Halloween magic? Here's a link to the other members of our 12 Kits of Occasions card club.
Kara
We also have a guest designer this month! Darnell Knaus
Don't forget to check our our 12 Kits of Occasions Blog too!
We also have a guest designer this month! Darnell Knaus
Don't forget to check our our 12 Kits of Occasions Blog too!
Labels:
Halloween,
Impression Obsession,
Lil Inker,
Silhouette
Sunday, September 22, 2013
Happy Birthday Sharron
![]() |
| Credit |
Surprise! I hope we have surprised you today...Sharron, you are such a sweet friend who has made countless cards for your blog friends, but today...we are honoring you! Joyce of Cards by the Sea has organized a blog hop to celebrate your birthday and we all have gotten busy making you cards to celebrate your special day. There is a long list of participants, so I will get right to my card for you.
I used some patterned papers by Simple Stories...Snap in greys and yellows. The sentiment stamped on Lil' Inker stitched square is from Stylish Sentiments Birthday by PTI. That great banner die...from Verve and I also used my silhouette to cut out the hot air balloon with all the layers popped up with dimensional foam. Thank you Joyce for organizing this hop for Sharron...you have become our go-to gal for birthday hops! Sharron, here's hoping you have a fabulous day celebrating with family and friends on your birthday!Who else has made a card for Sharron? Just follow the links and enjoy looking at all the birthday love Sharron's friends have come up with.
Cathy (That's me)
Tuesday, July 16, 2013
July 4 of a Kind: Travel Edition
It's been three months since our last 4 of a Kind post and we have a few changes this month. Marybeth of Marybeth's Time for Paper is working on some other responsibilities this month (make sure to stop by her blog and see what she has been up to) and we are so happy that our previous member, Renee has rejoined our little group. This month I am the hostess and the pressure was on to come up with something new and different that the other three ladies haven't used or don't already own it. As I was looking online for inspiration, I came across some digital patterned paper by Carta Bella, called Well Traveled. I loved that paper and ended up basing my entire kit around it and it's travel theme. Of course, the hostess...that would be me, failed to take a picture of the kit ingredients, but luckily Kim was well prepared and took one for us. Here is this month's kit ingredients:
As you can see, the patterned papers are such rich colors of cranberry, black, cream and kraft and I used my laser printer from work to print them out. There was a digital element kit that matched the papers and I printed and cut them out with my silhouette. I also included some washi tape, matching brads and other embellishments to go along with the travel theme.
Card #1:
Joyce likes to say these cards make themselves. I took my kit with me to Montana and they honestly did practically make themselves. I love the banner and balloon image in this one.
Card #2:
I included a cute cut file from Silhouette called with a luggage tag. I also found some stacked luggage in the Silhouette store and re-colored it digitally to match the kit. The postage stamp embossing folder is from Cuttlebug.
Card #3:
This card is made with PTI's World Map stamp. I distressed the edges and added a lot of tea dye to age it. The photo frames were from the Carta Bella kit.
Card #4:
This card is my favorite of the group although it is practically flat! I used the washi tape to make patterned strips and added the sentiment from PTI Postages stamp set. The little mini banner is made with Fabulous Frames dies.
Lots of fun this month, and I can honestly say I am totally stocked up on Miss You and any type of travel card I may ever need to send. Here are all four of the cards I made, all lined up on my photo shelf.
Now that you have seen my cards, you are going to have a lot more fun looking at the cards made by the other three talented ladies in our 4 of a Kind group. I am always amazed at how different our cards always are even though we use the exact same ingredients.
As you can see, the patterned papers are such rich colors of cranberry, black, cream and kraft and I used my laser printer from work to print them out. There was a digital element kit that matched the papers and I printed and cut them out with my silhouette. I also included some washi tape, matching brads and other embellishments to go along with the travel theme.
Card #1:
Joyce likes to say these cards make themselves. I took my kit with me to Montana and they honestly did practically make themselves. I love the banner and balloon image in this one.
Card #2:
I included a cute cut file from Silhouette called with a luggage tag. I also found some stacked luggage in the Silhouette store and re-colored it digitally to match the kit. The postage stamp embossing folder is from Cuttlebug.
Card #3:
This card is made with PTI's World Map stamp. I distressed the edges and added a lot of tea dye to age it. The photo frames were from the Carta Bella kit.
Card #4:
This card is my favorite of the group although it is practically flat! I used the washi tape to make patterned strips and added the sentiment from PTI Postages stamp set. The little mini banner is made with Fabulous Frames dies.
Lots of fun this month, and I can honestly say I am totally stocked up on Miss You and any type of travel card I may ever need to send. Here are all four of the cards I made, all lined up on my photo shelf.
Now that you have seen my cards, you are going to have a lot more fun looking at the cards made by the other three talented ladies in our 4 of a Kind group. I am always amazed at how different our cards always are even though we use the exact same ingredients.
Monday, June 17, 2013
Silhouette & Waltzingmouse July Blog Party: Summertime Fun!
and is just perfect for dressing up with my favorite stamps.
It's also time for the Waltzingmouse Blog Party...always a highlight of my month. The theme this month is Summertime Fun and whatever you love about this particular season. When my kids were younger, the 4th of July was always my favorite holiday. It is not as expensive as Christmas, there was not as much candy and sweet things around to wind the kids into a sugar crazed frenzy and my favorite part...it is Summer and the kids were always healthy, no colds or flu spreading wildly around our house. The kids would swim every day and spend so much time outdoors enjoying their time off from school. My kids are all grown up now, but I still look forward to the 4th of July and to spending time with them. We always have a big family barbeque and then watch the fireworks from our rooftop. I made a card which reminds me of our 4th of July barbeque.
The card has a wrap around apron string that has an additional spatula woven through it. I used some shiny silver cardstock to make the spatula. The inside of the card has some of the great fireworks scattered across it.
What's your favorite thing to do in the Summer? What do you look forward to every year? You still have time to make a card and link it on the Waltzingmouse blog...I'm looking forward to seeing what everyone else loves about this great season.
Saturday, June 15, 2013
CASology #48 :Yellow
I am leaving on vacation tomorrow...a very long, boring drive to our cabin in Montana. I always dread the drive, but once I am there...it is so beautiful and relaxing the drive is always worth it. Before I go, I have a card to share that I made for CASology #48. This week's cue word is Yellow. The first thing that always comes to mind when I think of the color yellow is the sun, especially during the hot Summer months here in CA. Too hot usually, but in June, the weather is very nice and the sunshine is welcome. Here is my card for the color yellow.
Not a lot of stamping on this card, just the sentiment from PTI Fillable Frames. I used a new die from My Favorite Things (Sunray) to cut an A2 panel layered over white cardstock. I added a bright cheery rainbow cut from a silhouette file and some clouds from PTI. The whole card took maybe 15 minutes to make...it actually took longer to clean up my mess. I am taking a great big box of stamps and dies with me on vacation...I can't think of a better way to spend some relaxing time!
Friday, June 7, 2013
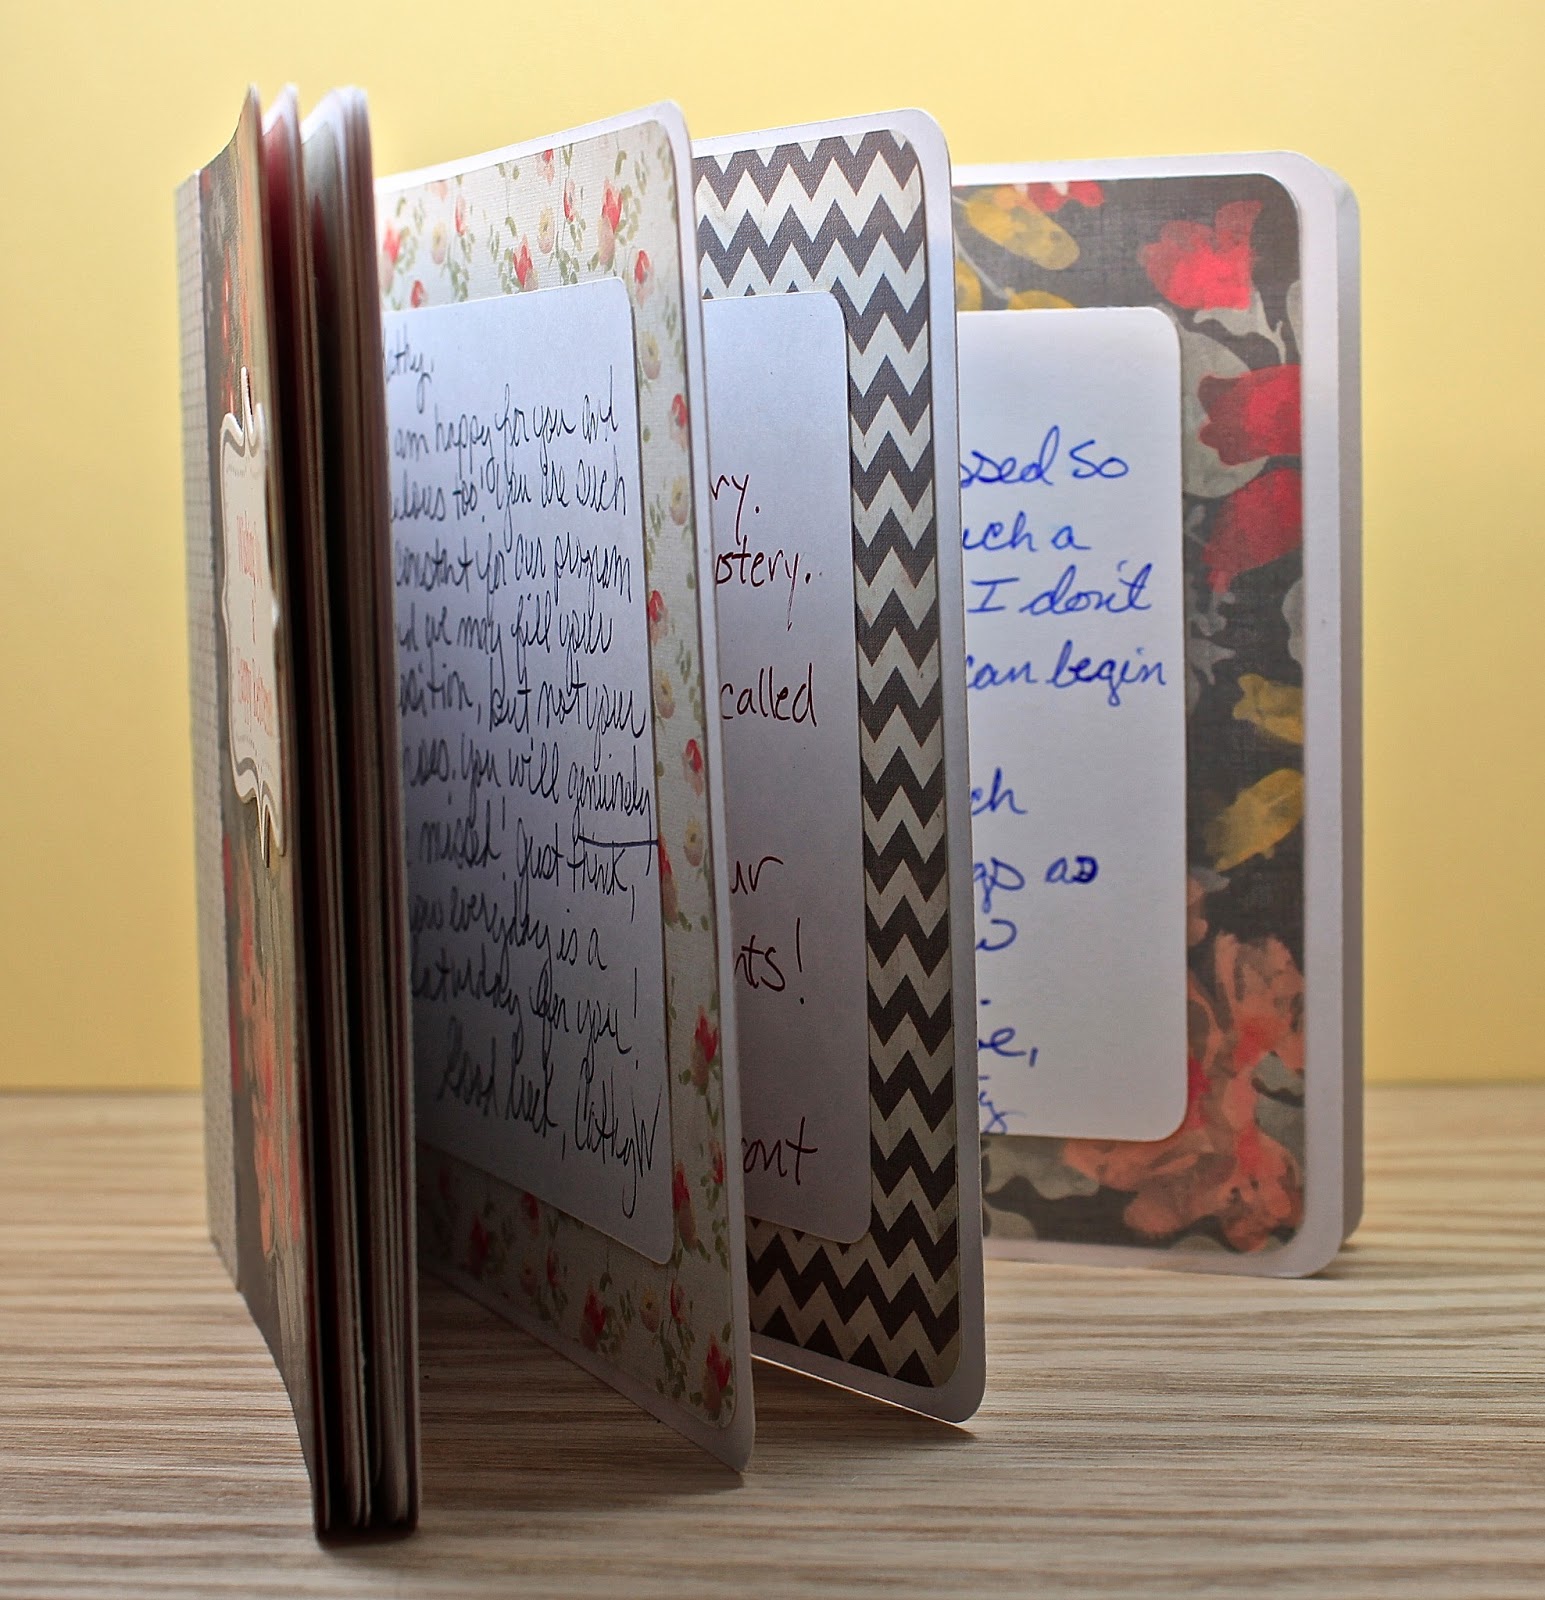
Happy Retirement Album
You can add as many pages as you want to the album and they are secured with two decorative brads.
I gave each person in the office a card with a little decorative trim on it and they all wrote their notes to our secretary. I collected them and adhered one on each page of the album.
I think this will mean a lot more to her than the standard card...hopefully she reads it at home when she is alone because some of the pages will bring tears to her eyes!
Sunday, June 2, 2013
CAS(e) this Sketch #30
This is my first time playing along with CAS(e) this Sketch. So many of my friends play along and they had a very cute sketch for us to use this week.
Although I love little banners, for some reason I wanted to use something just a little different with this sketch. Since I need a Father's Day card for my husband, I decided to make the little banners ties instead.
I cut the ties with my silhouette and layered them on a Lil Inker Stitched Mat. The sentiment is from Waltzingmouse Stamps (Man of the Hour). The patterned papers are from MME (Dolled Up) and I wanted my rhinestones to simulate tie pins and actually had to google tie pins to see where to place them. I guess you can tell I don't pay attention to Warren and his "going to work" wardrobe. I hope you can see the sketch in this card...it is a bit different, but the overall idea is there. You still have until Tuesday to make a card for this week's sketch. Here's a link for all the details!
Sunday, May 26, 2013
What have I been working on
I haven't posted any cards this week because I have been working on a little project I am making for myself. Have you ever checked out Kerri Bradford Studio? If you like to use a Silhouette or use svg files, you will love her blog and store. Kerri makes files that she sells and I found a really cute series of Painters Tray kits for all four seasons and several holidays. They are called the This & That series and she sells the kits with all of the files and patterned papers you need to make THE cutest project. All you have to do is print or cut them out and put it all together. I would love to be so creative myself and come up with all of the little bits and pieces she thinks up, but I am a much better "copier" than creator and this project is exactly as she made hers.
The best idea she has is using magnets to hold the sections in place so you only need one painter tray and can switch out the sections if you want to make more than one season. Now that I have the hang of it, I think I will give it a go coming up with my own tray for Fall. I have a while to work on it and should be able to finish one by Sept or early October. You should check out her store, she is super talented!
Monday, March 11, 2013
I'll Meet You Here
I've been working on a wedding scrapbook page for my daughter-in-law Ashley and finally finished one today. This page is about the day they shopped for their wedding venue. They really only had to look at a couple places before Ashley KNEW this was the right place. Andy...just nodded his head and said he liked it which was the right answer!
I used a layered template from Sweet Shoppe Designs for the design using Photoshop Elements which gave me the size of each element, then I laid it all out on my cameo and printed the pictures and all of the elements on my machine. I was even able to add the digital patterned paper to the shapes before I printed and cut them. I had some help from my friend Joyce of Cards by the Sea with the title, but ended up having this title pop into my head at the last minute. I plan to use Joyce's title ideas for later in the book. Ashley hasn't seen the page, but I showed her the pictures that were going to be used and she wrote up a journal entry of her thoughts from that day. So, Page 3 done...17 more to go!
Tuesday, March 5, 2013
Serendipity Stamps Blog Challenge #7 - Envelope Art
It's been a while since I have posted anything...although I have been busy getting ready for my son's wedding coming up in a few weeks. Today I am taking a break from wedding prep to share a project I made for Serendipity Stamps Challenge Blog #7 which is titled "Envelope Art". Although I don't write any letters these days, I do send cards and gifts to my crafty friends in padded envelopes. I have always though that those plain old manilla colored envelopes are so boring and decided to see if I could make a more cheerful one myself. There is a very good tutorial on how to make your own padded envelopes that can be found here.
As you can see, I chose an Easter theme...Serendipity Stamps has lots of great Easter stamps and dies making it very easy to create a cute Easter scene. To make the envelope, I just used two sheets of cardstock (one patterned, one solid), each 7.5 x 10.75". I cut an Easter basket on my Silhouette, ran it through an embossing folder to give it the basket-weave effect and threaded some thin ribbon through it. The cute Easter eggs are from Serendipity (Egg Outline Die) and (Scroll Scroll Die). I stamped a design on the solid egg using Serendipity Tiny Flower and colored it with some copics. The cute labels are also from Serendipity (Panel) and I think they look perfect as mailing labels. Just because I wanted to give my envelope a better chance of surviving the US Postal Service, I stitched everything down to give it a bit more strength.
I used rubber cement to adhere some bubble wrap to the inside (bubble side facing the paper).
Then you use a bit more glue to adhere the two pieces of cardstock together.
You smooth the the edges together with your bone folder, wait for it to dry and you are done!
Our Serendipity challenge was to make sure our envelope art was "mailable", so here's my proof!
I mailed my envelope with a few goodies to Serendipity Design Team Member and my good friend, Jeanne Jachna. Jeanne lives many states away from me, so I stitched around the edges of the envelope just to make sure my gift didn't fall apart en route.
Here is my envelope waiting for Jeanne in her mailbox:
Are you wondering how it held up? The answer is pretty well, just a little damage to the envelope, but mostly on the back side.
The front stayed in good shape and those eggs, although they look delicate...are in reality very strong!
Edit: I forgot to thank Jeanne's son Roger for photo-shopping the address labels off my pictures...he is so smart!
So, would I do this again...only for a super special occasion and never again during Winter. It was so warm in CA, I never even gave a thought to the fact that my package might get wet in snowy weather. I also would use two pieces of score tape in place of the rubber cement. I think they would have held the bubble wrap in place a little better.
It's time for you to make your own envelope art now...and you have a chance to win a great prize, $20 off your next Serendipity Stamp order. All you have to do is make some kind of envelope art using at least one Serendipity stamp or die in your design and post it on the Serendipity Stamps Challenge Blog. Here's the link.
The sale this week at Serendipity is buy 3, get your 4th item free and is valid from 3/6 through 3/13 and is a perfect opportunity to grab some Easter stamps!
Everyone on the Serendipity Design Team has some Envelope Art to share...make sure you check them all out!
I used rubber cement to adhere some bubble wrap to the inside (bubble side facing the paper).
Then you use a bit more glue to adhere the two pieces of cardstock together.
You smooth the the edges together with your bone folder, wait for it to dry and you are done!
Our Serendipity challenge was to make sure our envelope art was "mailable", so here's my proof!
I mailed my envelope with a few goodies to Serendipity Design Team Member and my good friend, Jeanne Jachna. Jeanne lives many states away from me, so I stitched around the edges of the envelope just to make sure my gift didn't fall apart en route.
Here is my envelope waiting for Jeanne in her mailbox:
Are you wondering how it held up? The answer is pretty well, just a little damage to the envelope, but mostly on the back side.
The front stayed in good shape and those eggs, although they look delicate...are in reality very strong!
Edit: I forgot to thank Jeanne's son Roger for photo-shopping the address labels off my pictures...he is so smart!
So, would I do this again...only for a super special occasion and never again during Winter. It was so warm in CA, I never even gave a thought to the fact that my package might get wet in snowy weather. I also would use two pieces of score tape in place of the rubber cement. I think they would have held the bubble wrap in place a little better.
It's time for you to make your own envelope art now...and you have a chance to win a great prize, $20 off your next Serendipity Stamp order. All you have to do is make some kind of envelope art using at least one Serendipity stamp or die in your design and post it on the Serendipity Stamps Challenge Blog. Here's the link.
The sale this week at Serendipity is buy 3, get your 4th item free and is valid from 3/6 through 3/13 and is a perfect opportunity to grab some Easter stamps!
Everyone on the Serendipity Design Team has some Envelope Art to share...make sure you check them all out!
![]() |
| Egg Scroll Die |
![]() |
| Egg Outline Die |
![]() |
| Tiny Flower |
![]() |
| Panel |
Tuesday, February 26, 2013
What have I been doing?
It appears as though I haven't been doing anything crafty for awhile, but in reality I have been taking 3 online classes through Jessica Sprague trying to learn how to use my new birthday present to myself, a Silhouette Cameo. I have a Cameo at work where we teach kids how to make vinyl stickers...but until I got my own, I never realized how much that machine can do! It is true, "You don't know, what you don't know!"
The three classes I have been taking are here.
I took Getting to Know You, Oh, the places you will go and I am in the middle of Designer Studio Edition. That is the one I have been the most excited to try since it apparently teaches you how to use digital cuts files, although I haven't gotten that far yet. There is a bit of homework involved...and if you are like me and haven't taken a class in many, many years...it took a bit of time to figure it all out. Here is the final project I made for the second class.
It doesn't look like much, and it is something I could have made myself provided I had all the dies and stamps, but I made it all on the Cameo. You even lay the whole thing out on your computer screen so you can see just where everything is going to go, what color it will be, etc. My favorite part is the circle background. It started off with just a single circle. Then you add another circle, then a star, weld it together, replicate it a bunch of times, squeeze it all together and finally cut it down to the right size. Whew. It took a while. The layout is one that came with the class and I got Warren to come in and take a picture of me (notice...no makeup-less face is showing!)
The chevron stripes are print and cut files...you just print them with registration marks on your paper and then the machine automatically knows where to cut it. Very neat! The little banner was one of the tasks in the lesson and the think.think.think. tag was made with a rounded rectangle and I added the type and color...printed it and again, the machine cut it off.
I also made a tag on the machine..it looked just like this one, only with no score marks, so I ended up using a PTI tag I liked better. Honestly, the only independent thought I added to the project was the Lil Inker mini bow, just because I think it is cute. I plan to frame this and keep it up on the wall in my craft room as a reminder of the many hours I spent trying to learn how to use my machine!
The three classes I have been taking are here.
I took Getting to Know You, Oh, the places you will go and I am in the middle of Designer Studio Edition. That is the one I have been the most excited to try since it apparently teaches you how to use digital cuts files, although I haven't gotten that far yet. There is a bit of homework involved...and if you are like me and haven't taken a class in many, many years...it took a bit of time to figure it all out. Here is the final project I made for the second class.
It doesn't look like much, and it is something I could have made myself provided I had all the dies and stamps, but I made it all on the Cameo. You even lay the whole thing out on your computer screen so you can see just where everything is going to go, what color it will be, etc. My favorite part is the circle background. It started off with just a single circle. Then you add another circle, then a star, weld it together, replicate it a bunch of times, squeeze it all together and finally cut it down to the right size. Whew. It took a while. The layout is one that came with the class and I got Warren to come in and take a picture of me (notice...no makeup-less face is showing!)
The chevron stripes are print and cut files...you just print them with registration marks on your paper and then the machine automatically knows where to cut it. Very neat! The little banner was one of the tasks in the lesson and the think.think.think. tag was made with a rounded rectangle and I added the type and color...printed it and again, the machine cut it off.
I also made a tag on the machine..it looked just like this one, only with no score marks, so I ended up using a PTI tag I liked better. Honestly, the only independent thought I added to the project was the Lil Inker mini bow, just because I think it is cute. I plan to frame this and keep it up on the wall in my craft room as a reminder of the many hours I spent trying to learn how to use my machine!
Subscribe to:
Posts (Atom)